

How To Change The Font Size In Outlook Email

Here's how to change and customize the font for email titles, row headings, and the body of messages in the Reading Pane of Outlook 2016.
Most people know that they can change the color themes for Office 2016 for PC and on the Mac version. Changing the colors is a popular way to customize the look and feel of Outlook and other programs in the suite. But did you know you can also customize the fonts in the Reading Pane too?
We already showed you how to customize fonts in Outlook 2010, but things have changed quite a bit since then. So here's how to find this little-known setting to customize the font for email titles, row headings, and the body of messages.
Customize Outlook Reading Pane Fonts
First, from the Ribbon, select the View tab and then Current View > View Settings.
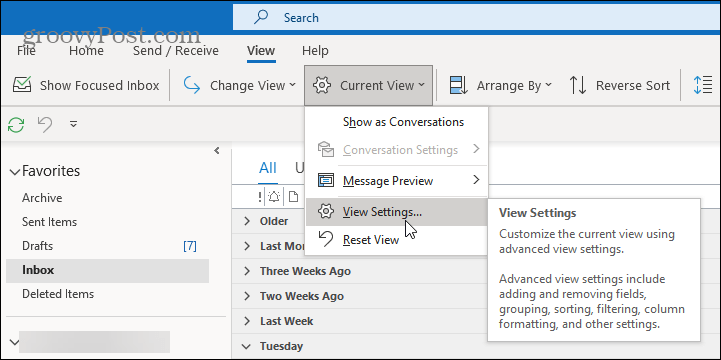
When the "Advanced View Settings" window comes up, there are two buttons to note that allow changing fonts — Other Settings and Conditional Formatting.
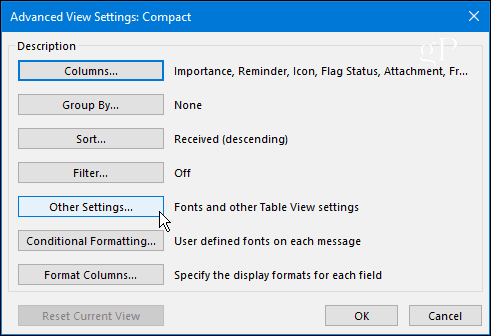
Other Settings lets you adjust fonts for column headings, Message Previews, and more. For instance, I prefer my Reading Pane set to the bottom, which you can set here or by going to View > Layout > Reading Pane and choose where you want it. Like with all versions of Windows, Outlook has a lot of redundancy when it comes to settings options.
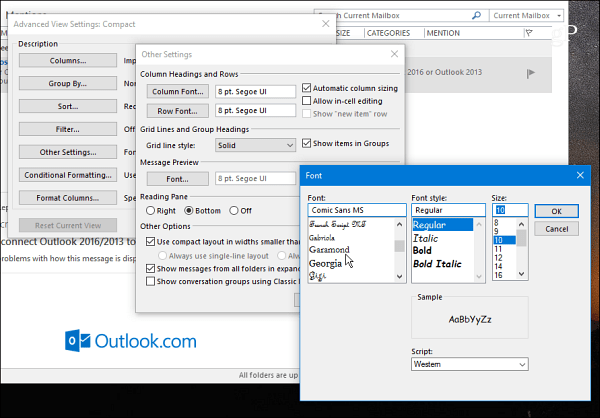
Go ahead and play around with different settings until you get the look you want. In the example below, I changed the Colum, Row, and Message Preview fonts to everyone's favorite — Comic Sans (and, yes, that would be a joke).

Use Conditional Formatting
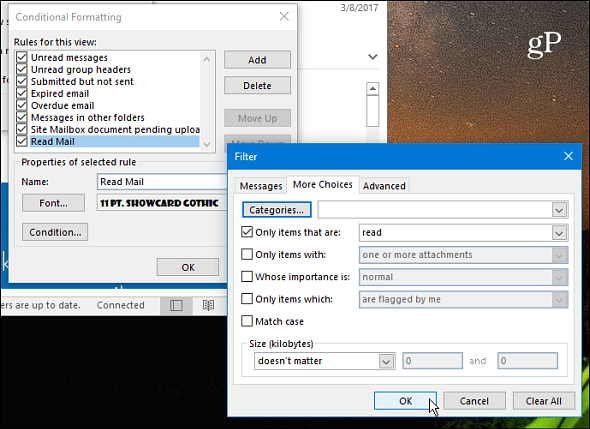
Conditional Formatting lets you customize things based on the email rules you have set up. By default, there are seven rules enabled that you can customize or add your own. You create a Rule by selecting Add > Condition > More Choices and then add your rule there. In the example below, I created a Rule for only items that are read.
Then I set the font to ShowCard Gothic. If you have a busy inbox, having the ability to customize fonts based on rules is a good way to make your most important mail grab your attention.
After making just a few tweaks, this is what I ended up with on my Reading Pane. Of course, you can set things up for what works best for you and your workflow.
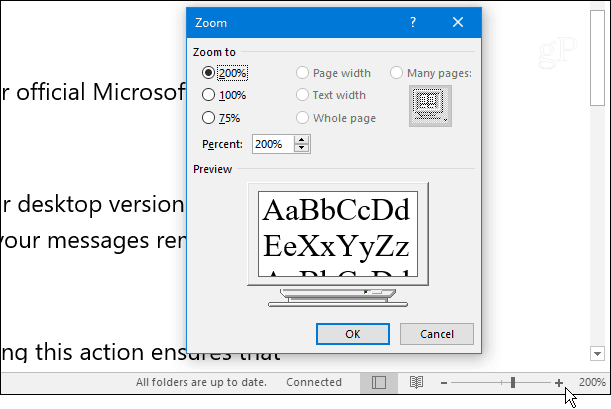
Another setting worth pointing out is the ability to make the font in the message body larger. Just use the slider located at the lower-right corner to increase or decrease the font size. Or, select the zoom button and choose a specific size. Another way to zoom is to hold the Ctrl key while in the body of the message and scroll the mouse wheel up or down.
Do you like to customize the Reading Pane fonts in Outlook? Leave us a comment below and tell us what works best for you.
![]()
How To Change The Font Size In Outlook Email
Source: https://www.groovypost.com/howto/customize-outlook-2016-reading-pane-fonts/
Posted by: rossnalack.blogspot.com
0 Response to "How To Change The Font Size In Outlook Email"
Post a Comment